Email tasks
Table of contents
- Integrations and Emailing Tasks to Nozbe Classic (video)
- Setting up Your Nozbe Classic Email Address
- Forwarding an Email to Nozbe Classic to Convert It to a Task
- Emailing Multiple Tasks at Once
- Trick: Emailing task with checklist
- Trick: Emailing Comments to Already Existing Tasks
- More About Emailing Tasks
Integrations and Emailing Tasks to Nozbe Classic Works (video)
Setting up Your Nozbe Classic Email Address
- Integrations and Emailing Tasks to Nozbe Classic (video)
- Setting up Your Nozbe Classic Email Address
- Forwarding an Email to Nozbe Classic to Convert It to a Task
- Emailing Multiple Tasks at Once
- Trick: Emailing task with checklist
- Trick: Emailing Comments to Already Existing Tasks
- More About Emailing Tasks
One of the most useful features in daily life is the ability to email tasks and attachments to Nozbe Classic. All you need to set up is your nickname and PIN in the settings (Integrations) of your account. It will create your unique email address within Nozbe Classic that will allow the system to recognize the email as actionable and yours.
You can set your nickname and PIN in the account settings (1) —> Integrations (2)
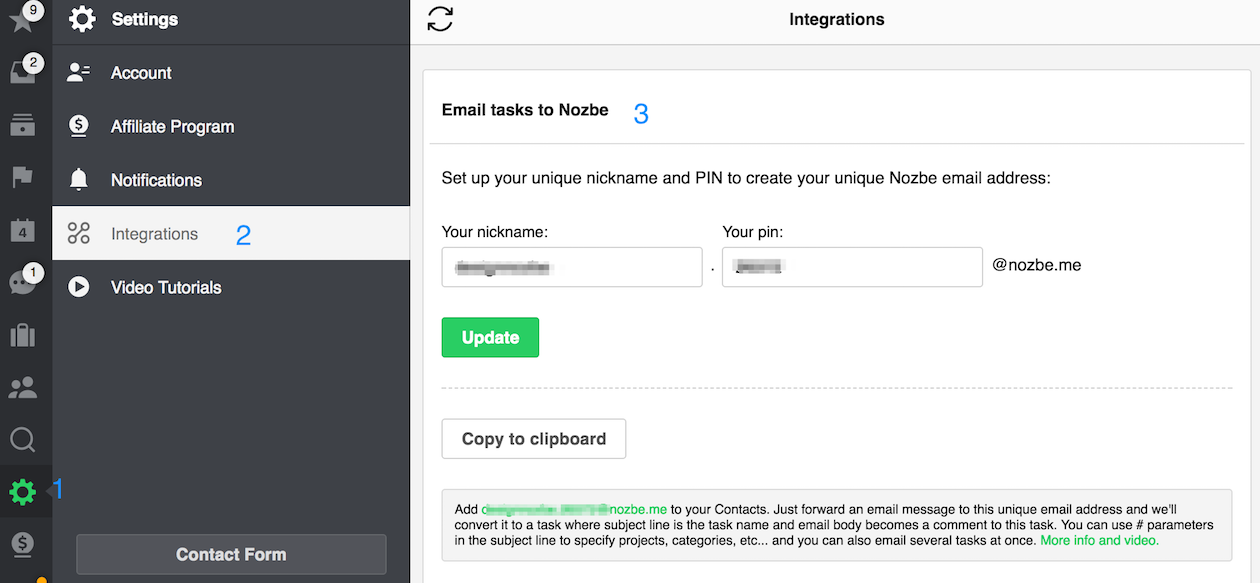
Now enter your nickname and PIN in the fields and update the changes. Once done, your personalized email is set up.
Example: if you set a nickname to “ann” and PIN to 2222, your email for Nozbe Classic would be ann.2222@nozbe.me. Do not forget to type a dot between your Nickname and PIN!
Forwarding an Email to Nozbe Classic to Convert It to a Task
Now, to send the 1st task, you need to go to your email client. Open a new message, type the address, and a task name. The subject line can be your task name, but you can also type its name in the body of the message, just as shown in the Example below:
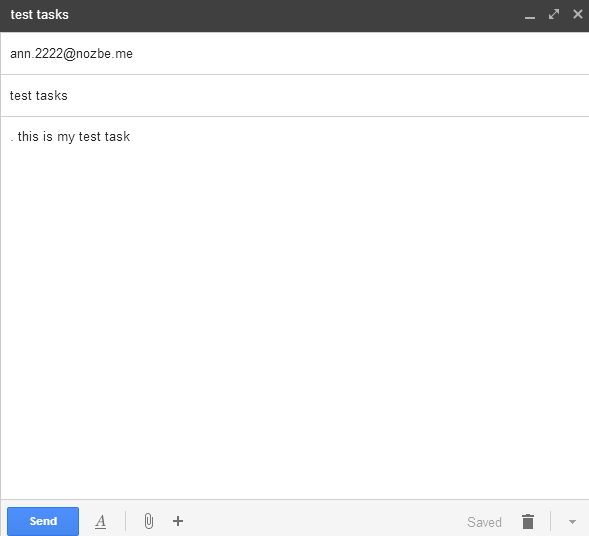
Please note that there is a period before the name of the task and one space ((.)(space)(task)). Both “.” and a “space” are essential for correct interpretation by the system.
The message will end up in Nozbe Classic within a few seconds as a task in your Inbox. Also, anything below the name of the task will end up as a comment to that task.
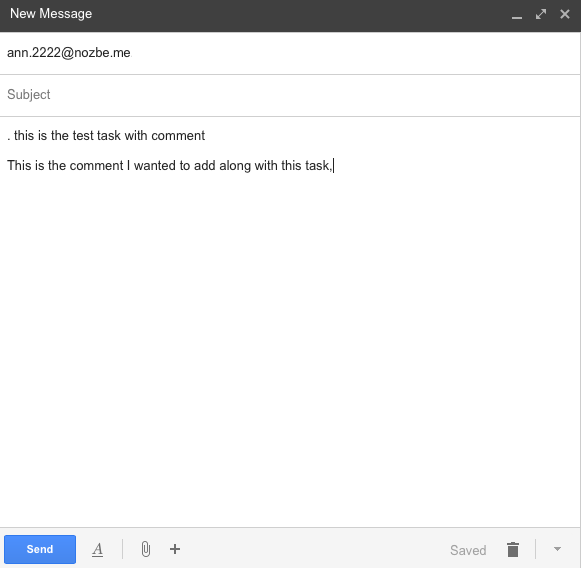
The effect for both those examples will be as follows:
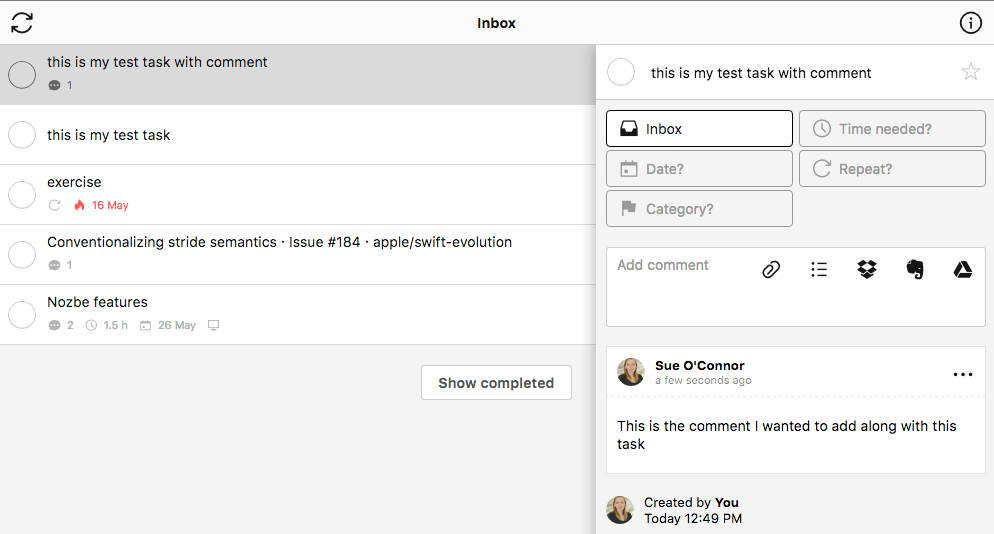
If you send your email via Gmail or Apple Mail, Nozbe Classic will automatically add a direct link to it to your comment. So if you need to view the original message, just tap on the link to go back to it.
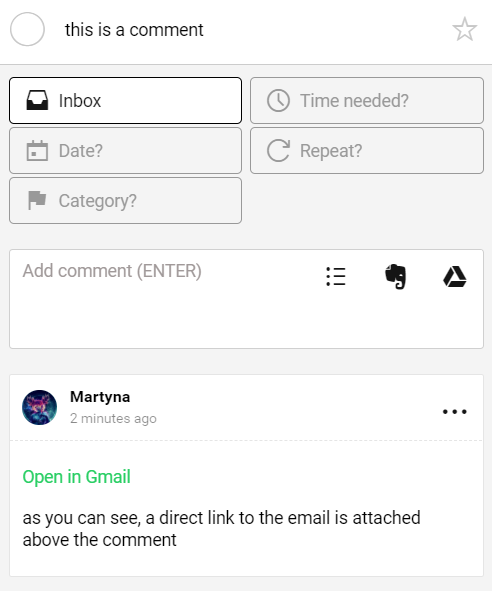
All of the formatting used for creating actions also works in emailing them to Nozbe Classic. So if you want to send a task to the specific project or with a specific category, delegation, etc. just use Hashtags(#). Here is more on that: Hashtags
Emailing Multiple Tasks at Once
One of the most useful aspects of emailing tasks to Nozbe Classic is that you can add as many tasks as you want to. Here is an example:
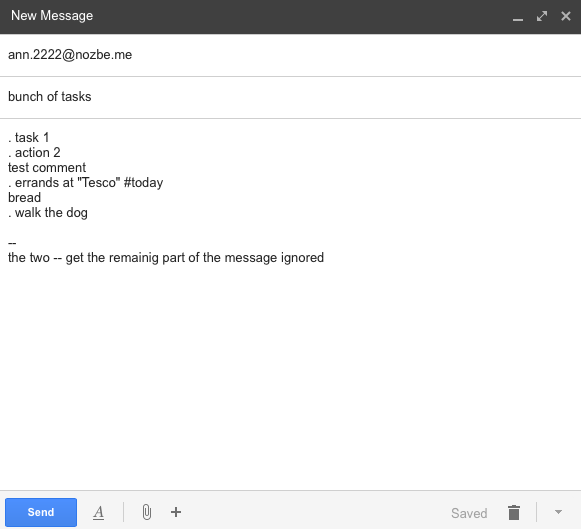
The result in the Inbox a second later is:

Now you can see the tasks with comments in Inbox, and the tasks I have scheduled for today are marked with a star and a date-tag. Also, the part that I have cut off by typing a double hyphen (–) — got ignored.
Trick: Emailing task with a checklist
If you want to include a checklist in your task, type the word “checklist:” and use brackets and minus/plus signs to include checklist elements. Just like on the screen below:
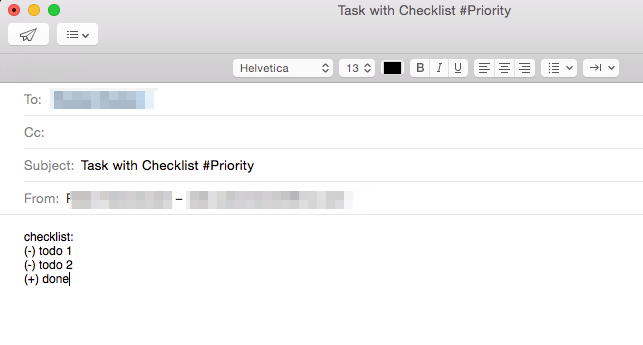
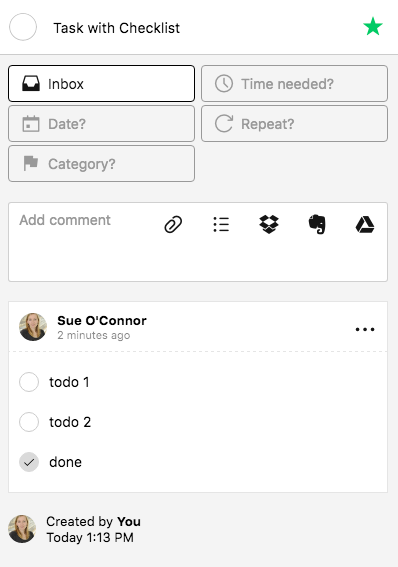
After sending such an email, you will have a task with a checklist in your Nozbe Classic.
Trick: Emailing of Comments to Already Existing Tasks
Here’s an example that best illustrates how it works. Let say we have a project “Trip to NY “and one of my tasks there: “new suitcase.”
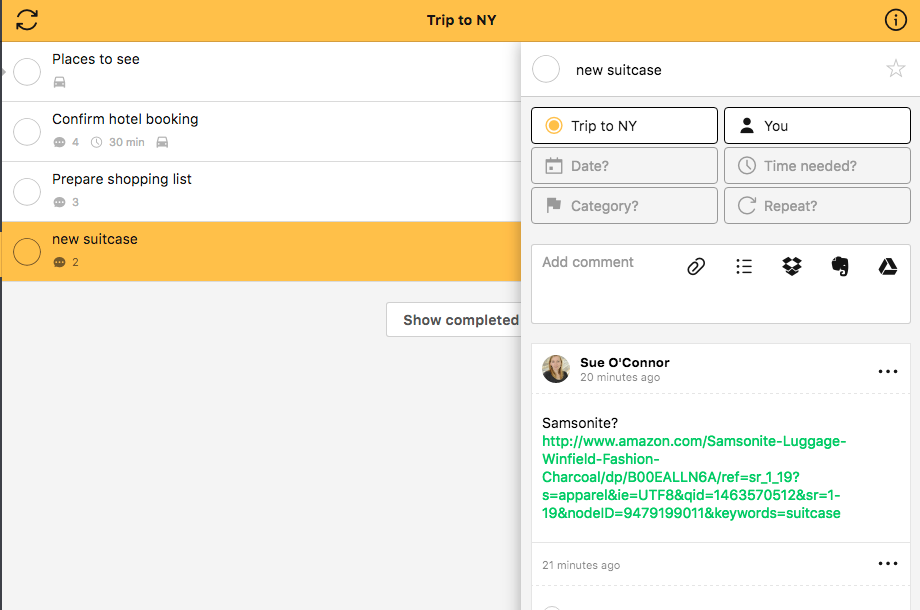
We search the web for ideas and come up with several things we would like to add to it. We then start with the email address we use for sending emails to Nozbe Classic: nick.PIN@nozbe.me (please check on yours your account’s settings).
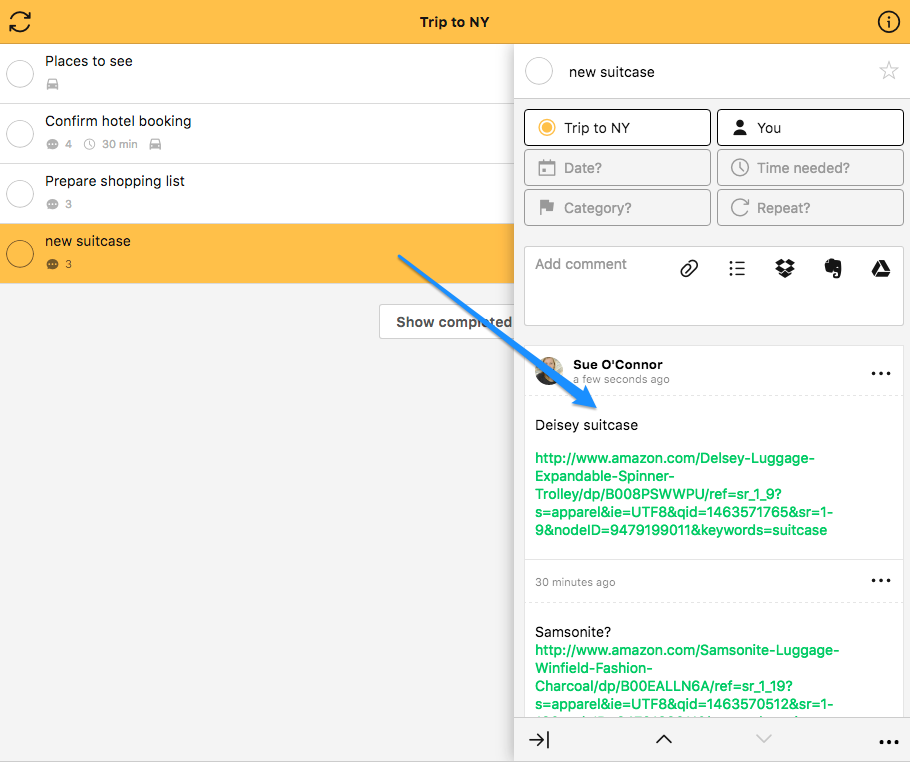
But here, the similarities end. Once we have the email, we’ll need to inform Nozbe Classic of which task we wish to add the comment to, and that can be only done by amending our title line in the message. The format should be as follows: #task: TASK NAME
In this example, the title line should look like this #task: new suitcase
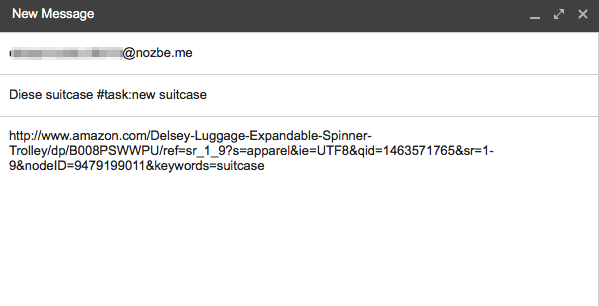
Please be aware that:
- This parameter can be added instead of a subject line or at the end of it. In the latter case, the rest of the subject line will go to the beginning of the comment
- You don’t have to put the entire name of the task: “new suitcase. " It is enough to write a fragment “new sui “or “suitcase “or “new su. "
- If the task’s name matches other tasks, the comment will go randomly to one of them if you don’t specify the destination project. To prevent it, you have to add the project’s name parameter: #task: task name #name of the project.
More About Emailing Tasks
Do you know that you can use hashtags and delegate tasks to a specific team member? You can read about it on our blog.


