Project Templates
Table of contents
Video Introduction to Project Templates
What Are Project Templates?
Project templates are a great tool to manage assignments that require always completing the same set of tasks, for example introducing a new member into your company or preparing a monthly report for your customer.
In addition to the list of tasks, a template will also record all participating users along with their responsibilities, categories, time needed, recurrence, all comments and project notes.
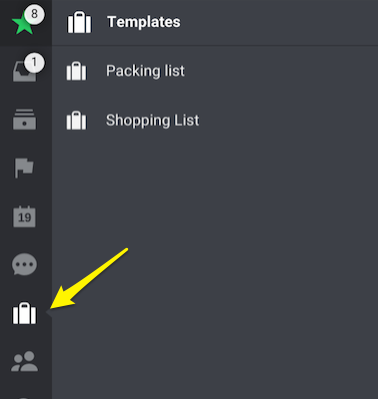
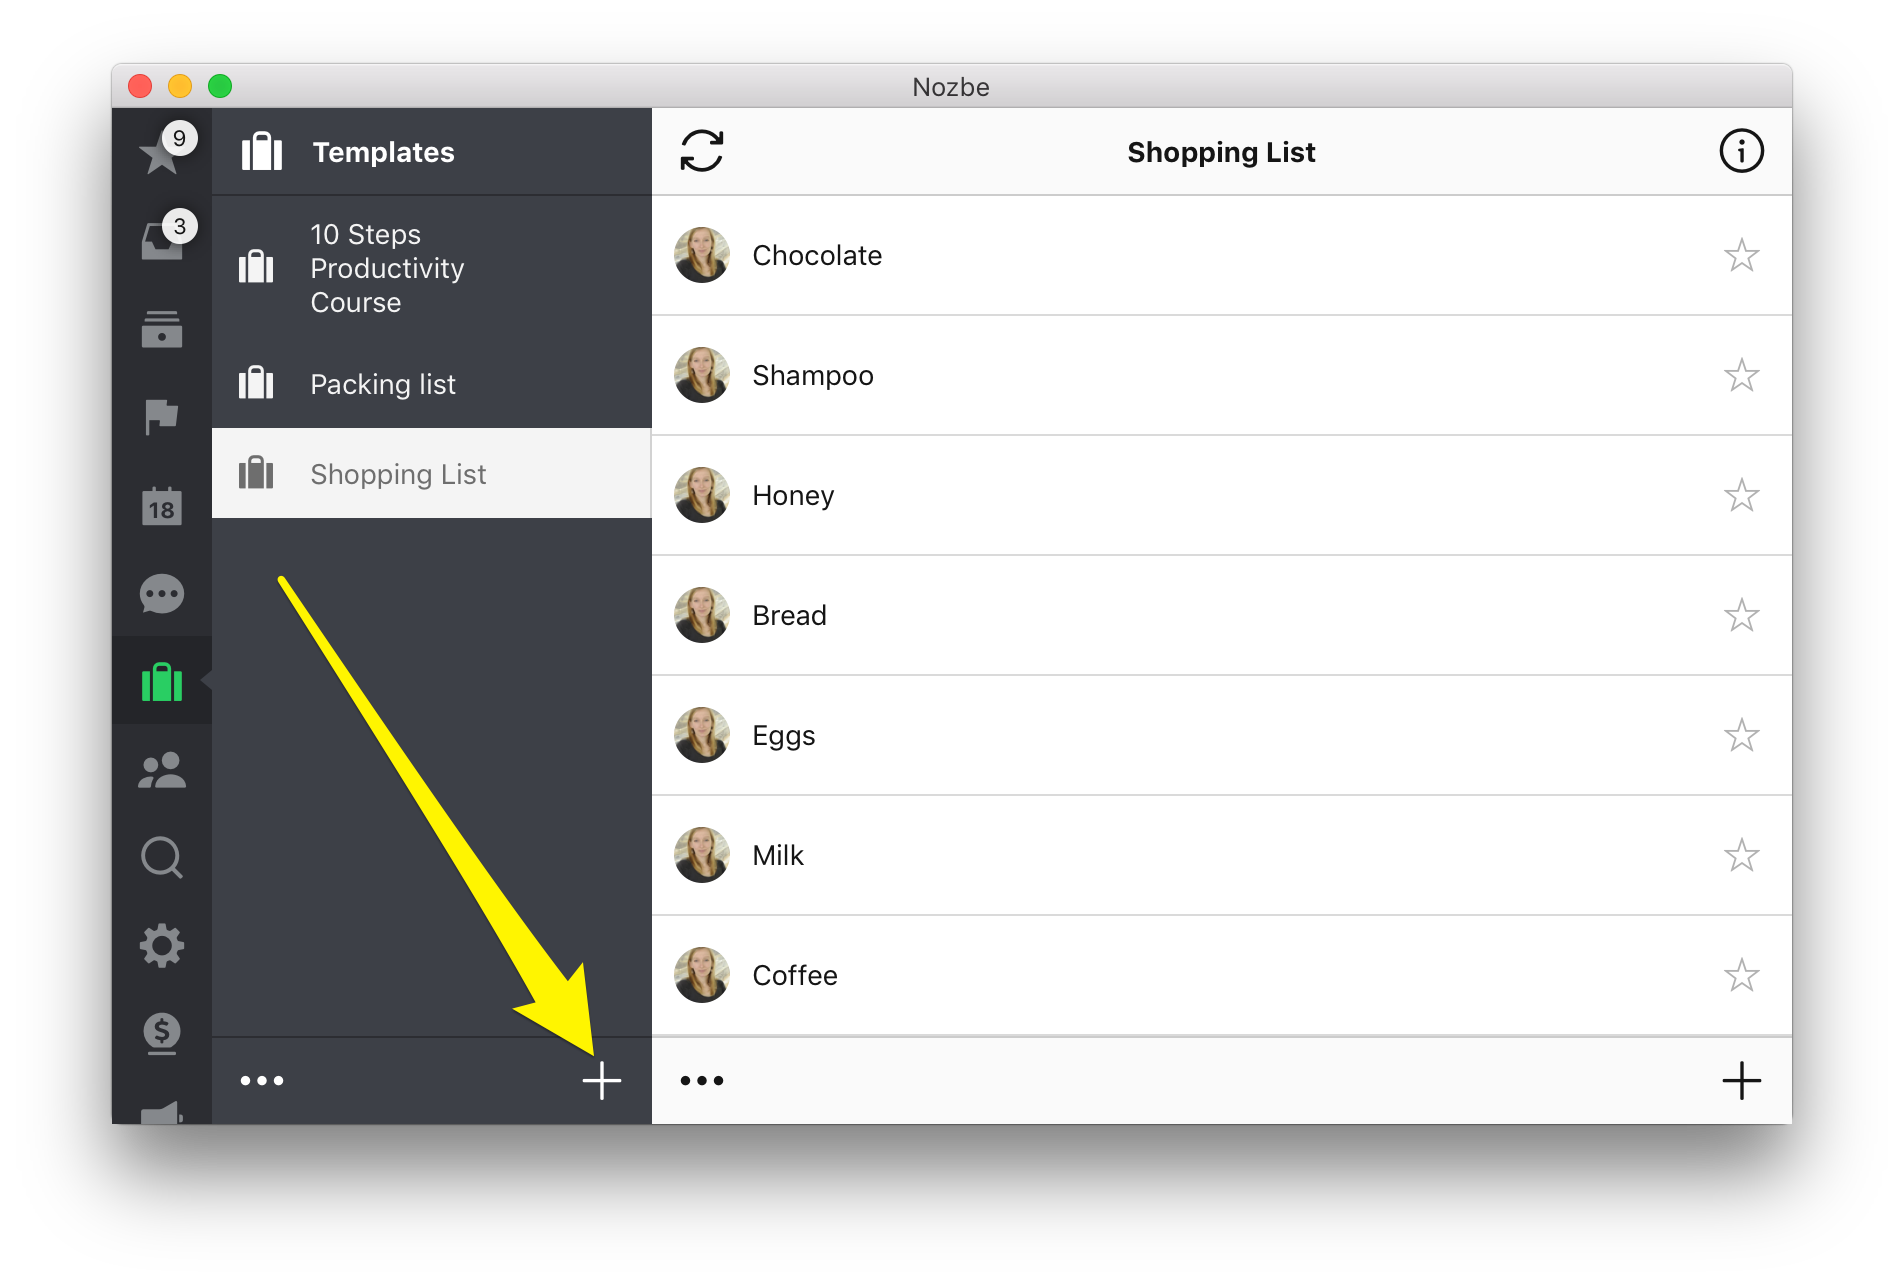
To view all your templates, go to the templates tab:
How to Create or Update a Template?
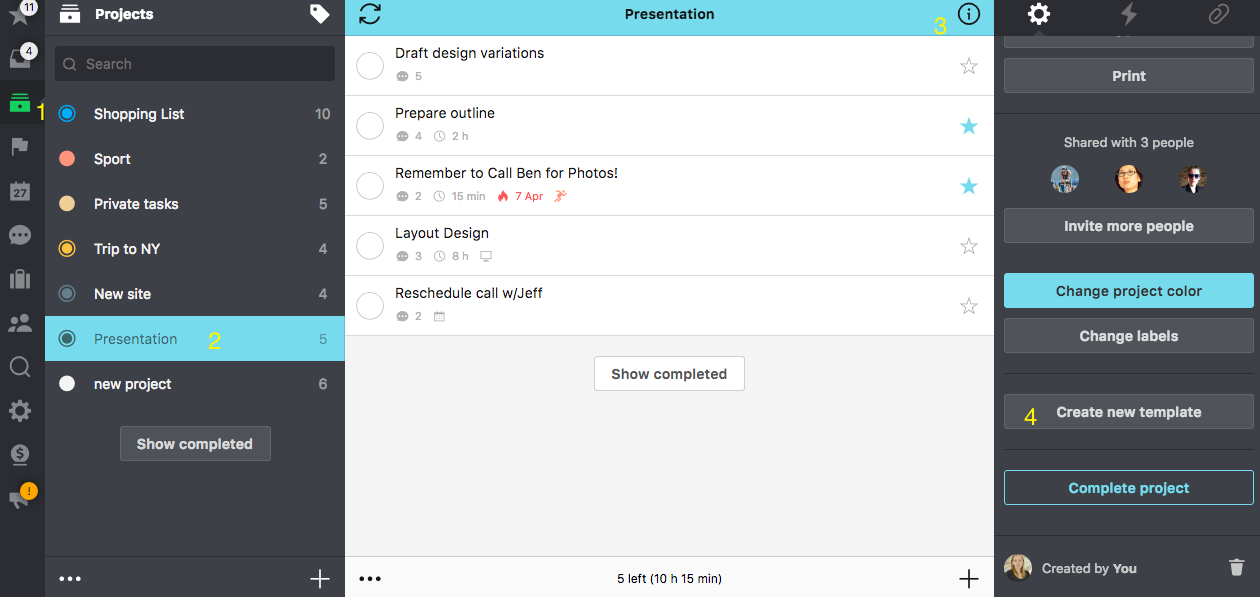
To create a new template, open the source project (1-2), go to the Infobar (3) and use the “Create new template” button (4):
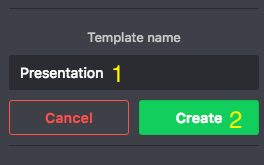
You will be asked to input the template name (1). Once done, click on “Create” (2).
The dates you add to the tasks in the project are relative and not fixed. The most important thing is that the template shows the date you originally set in the project. That is why creating a template from the project will change the dates accordingly.
For example, in a project, we have a task called „Marketing Meeting“ created on June 12th, and we added a due date “June 13th”. Right now the task is marked as overdue. However, we want to create a template for this particular project now. Today is July 14th, so the date of „Marketing Meeting“ becomes July 15th (one day after creating the task).
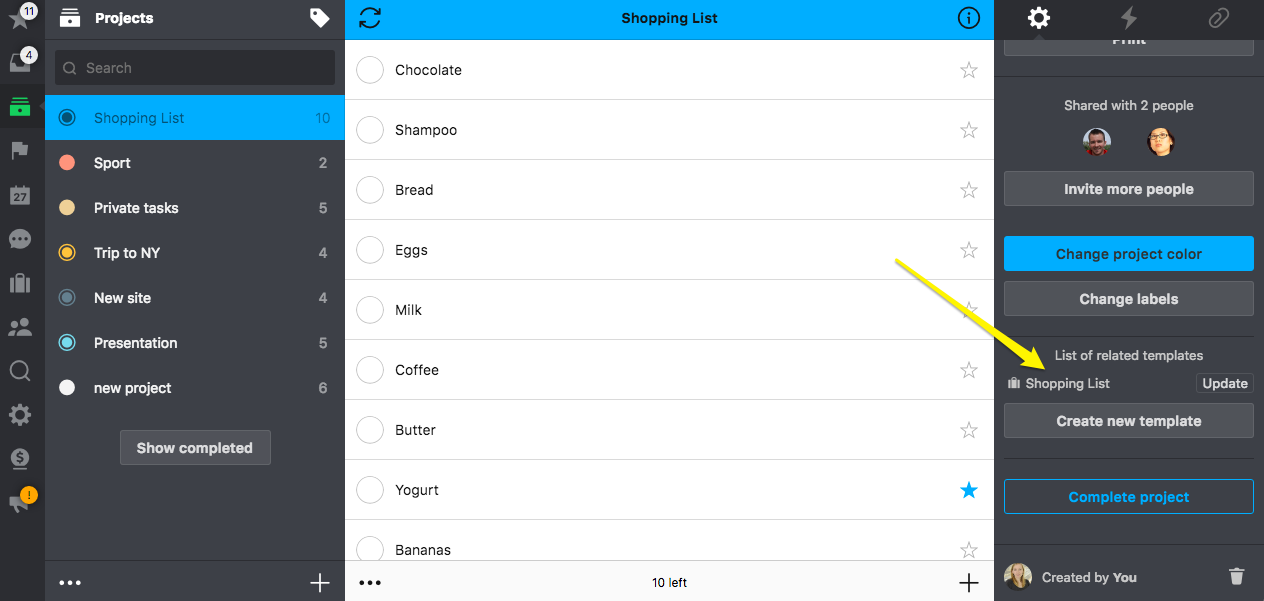
You can update the template in the Infobar in the project view or just edit it in the template view.
You can also create a template from a scratch. Just pick templates in left menu and use “+” button to add a new one.
Once you create it, you can open its Infobar (1) and change its color (2) and icon (3).
By clicking the “Add people to this template” button, you save a list of people you’ll invite to any project you create out of that template.
How to Edit a Template?
Templates can be edited the same way as any other project in Nozbe Classic. You can add new tasks, edit or remove them. Please note that the edited template can be overwritten when you update the template in the project view. The list of templates can be edited in the ‘edit‘ view (three dots on the bottom of the site), you can select here the templates you wish to edit.
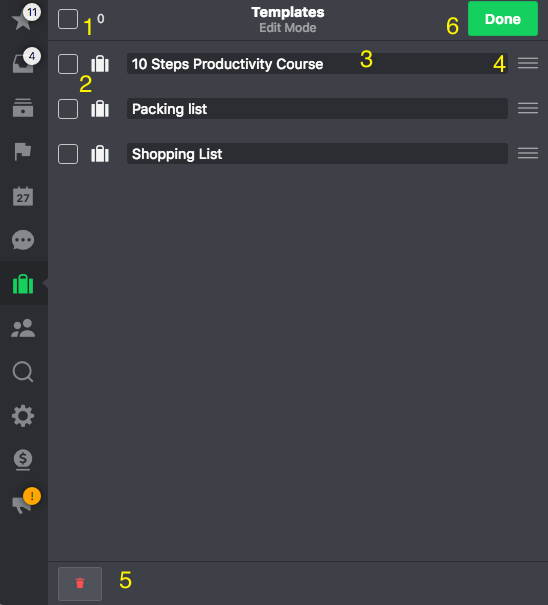
- select all templates to edit them
- or only one or two
- change the name of template
- reorder per drag and drop
- or delete it
- do not forget to save the changes by clicking ‘done’.
How to Create a Project out of a Template?
To create a project out of a template, follow the steps below.
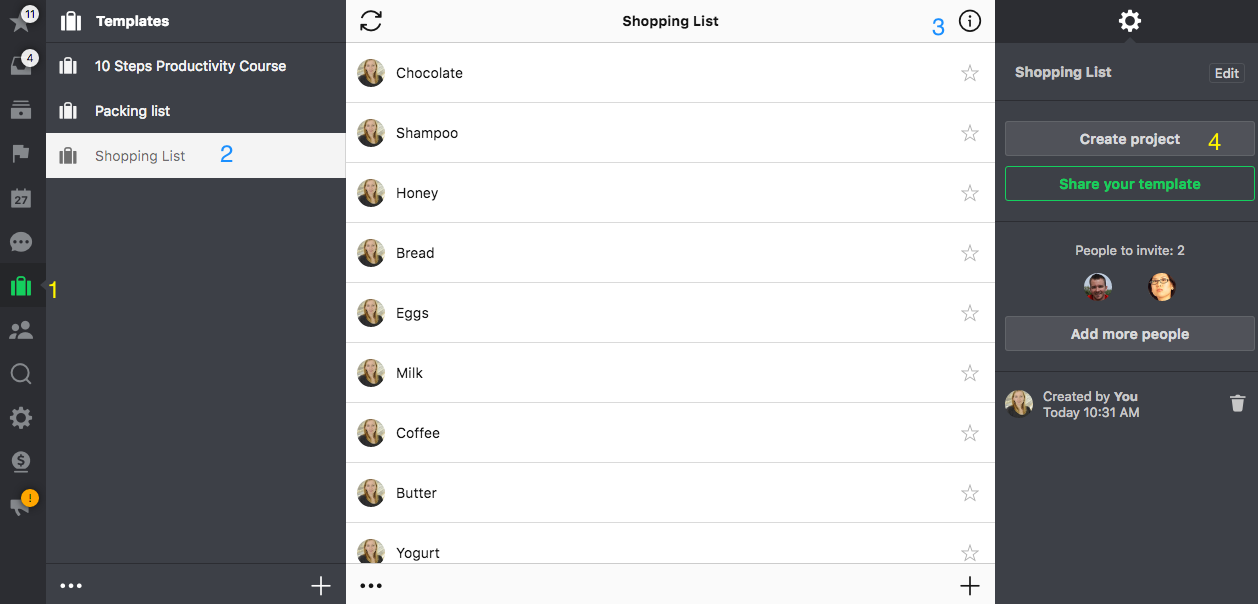
- Go to “Templates”.
- Choose a template from your list
- Go to its Infobar by clicking the “i” icon
- Click “Create Project”.
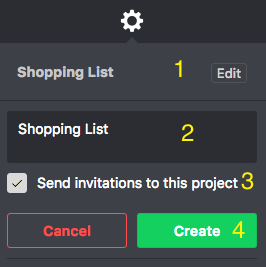
In this view you can see the name of the template you used to create the new project (1), you can type the new projects name here (2), with the tick set in this window all people saved in the template will automatically be invited to the newly created project. (You can always untick it when you don´t wish to invite them). With the button “Create” (4) you´ll create a new project from your template.
How to Share the new Project Created out of a Template?
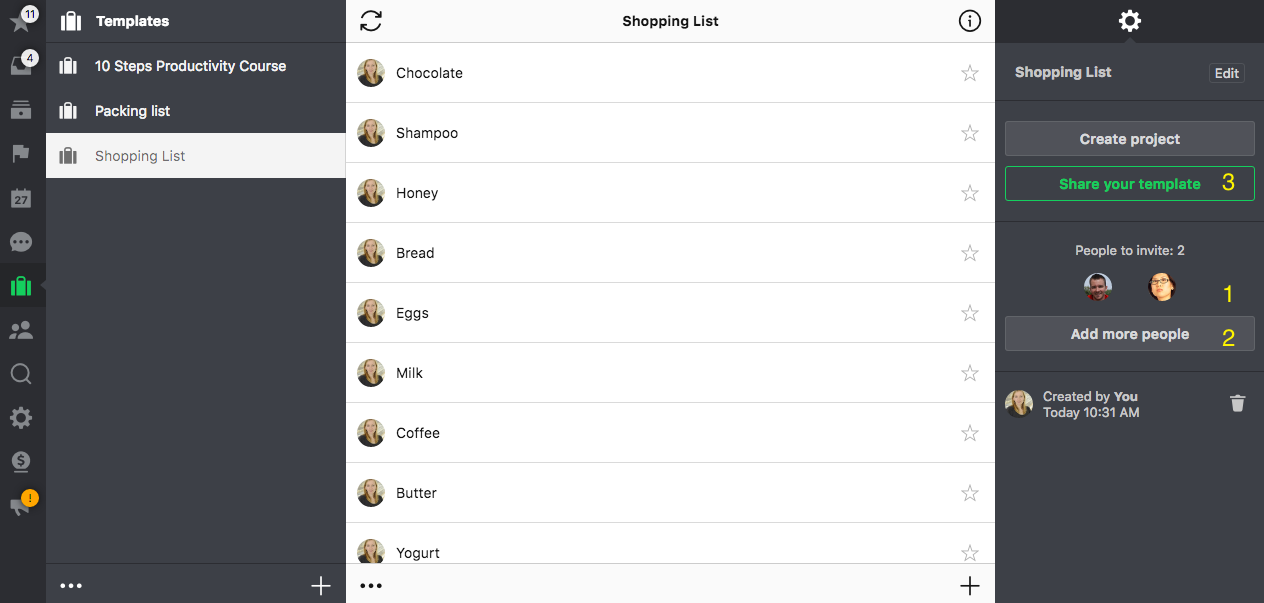
If you want to share a template with other team members, you may:
- generate a link to your template (3) and send it to your teammates. They will be able to add your template to their Nozbe Classic as a project and then create a template from it.
-
create a project from your template (Template > Infobar “i” > Create project) and share it with your teammates.
-
add other users to your template, and as soon as you create the new project, the invitations to it will be sent automatically. You can see the invited users here (1). You can also add more people (or remove some of them) (2)
-
copy this link and send it per email or share it on your Facebook or Twitter account.
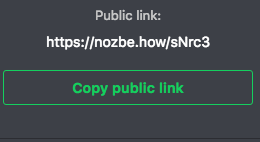
- share your template and your knowledge and ideas with other Nozbe Classic user on our how.nozbe.com site!
More about templates
Do you know a difference between sharing a template and inviting someone to it? Or maybe you published a template by mistake and want to know how to take it down? You can read about it on our blog.


