
Categories
Table of contents
- Video Introduction to Categories
- What Are Categories?
- Categories List
- Creating a Category
- Adding or Removing a Category to/from a Task
- Infobar of a Category
- Managing Categories (edit mode)
- Sharing Categories
- More About Categories
- Related Free Course: Step 6: Contexts of “10 Steps to Ultimate Productivity”
Video Introduction to Categories
What are Categories?
- Video Introduction to Categories
- What Are Categories?
- Categories List
- Creating a Category
- Adding or Removing a Category to/from a Task
- Infobar of a Category
- Managing Categories (edit mode)
- Sharing Categories
- More About Categories
- Related Free Course: Step 6: Contexts of “10 Steps to Ultimate Productivity”
Per description provided in David Allen’s “Getting Things Done”, categories (aka contexts) are used to categorize your tasks/actions by places, tools or people required for the task completion. One of the best examples is a “phone” which can be a tool needed to complete tasks across many projects. The basic goal for them is to allow you to group actions and do them in bundles unrelated to the project, but related to a particular person or a place or a tool used.
Categories List
Categories are right below your project list in Nozbe Classic menu and they work in a similar way to projects.
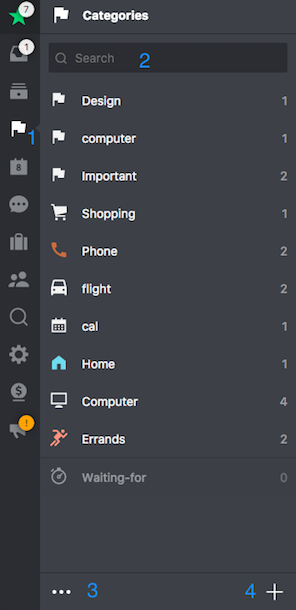
- Categories icon after folding the sidebar
- Filtering by name
- Edit mode (described below)
- “+” button for adding new category
Creating a Category
There are two ways to create a category.
1. Use the “+” button on the category list
You can create new category directly in the list:
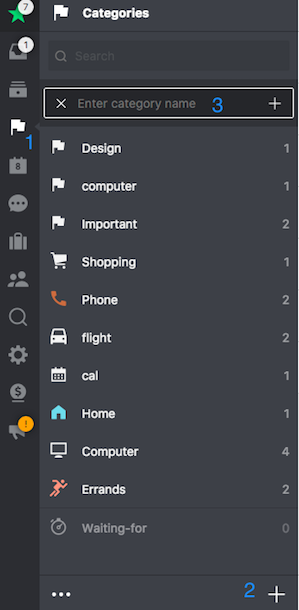
In the categories view (1), just click the “+” icon (2). Text input window appears at the top of the list (3).
Type now the name of a category and click “Save”. Please note that per default “flag” icon is added, to change it you will need to edit this category.
2. Create a category in the task parameters view
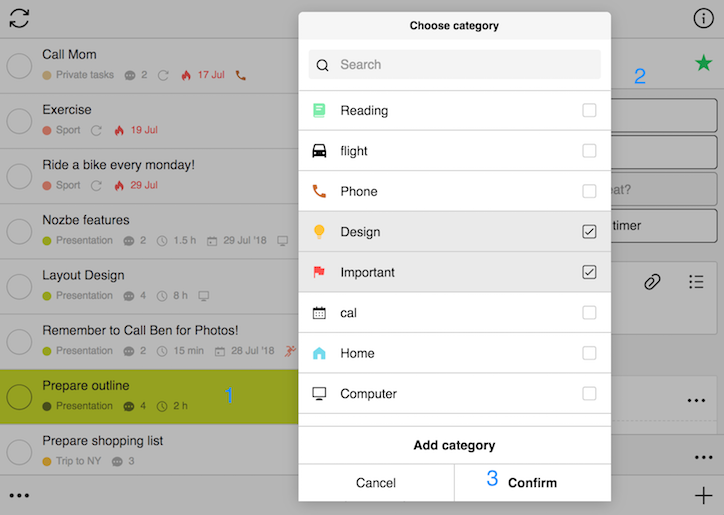
Second way to create a new category is available when changing categories in an existing task
- Pick a task from your current view
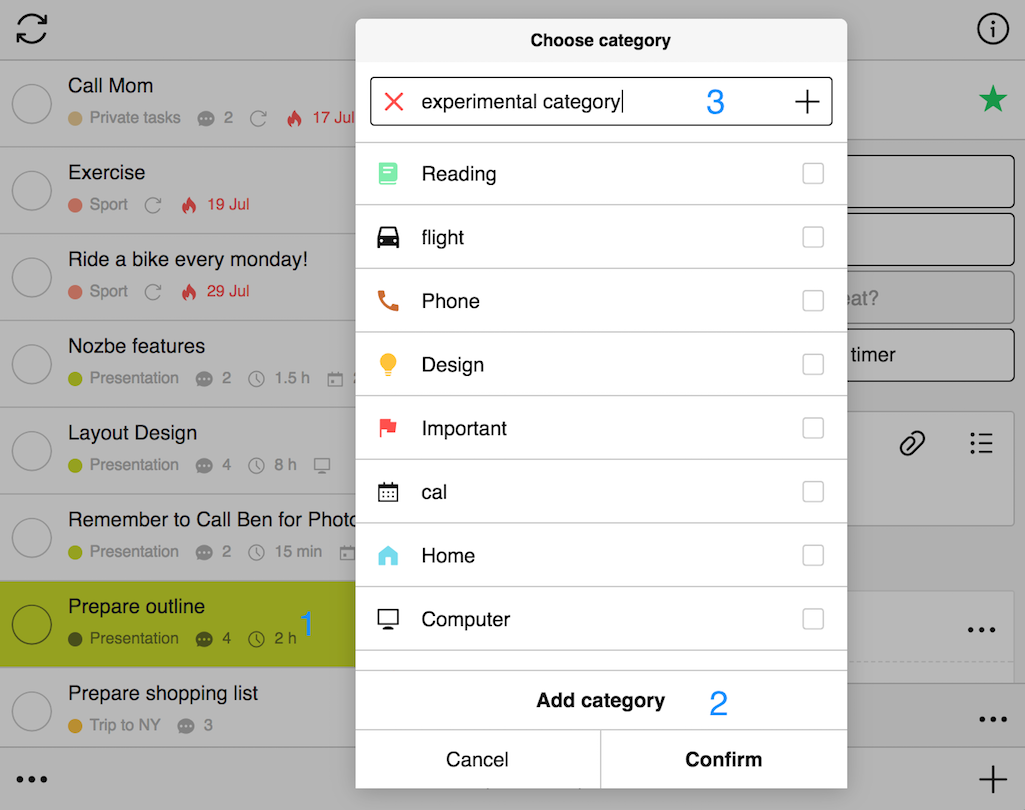
- Click on the “Category” button in the details section
- Click „Add category“ in the menu (2)
An input window at the top of the list appears. Here, we write a name: “experimental category” (3).
- With the „+“ or „Enter“ button add this new category to the list.
- Clicking “Confirm” will add this new category to your task.
Adding or Removing a Category to/from a Task
You can add a category by using the hashtag formatting while creating a task. The system will automatically show you suggestions when you enter a # and a few first letters.
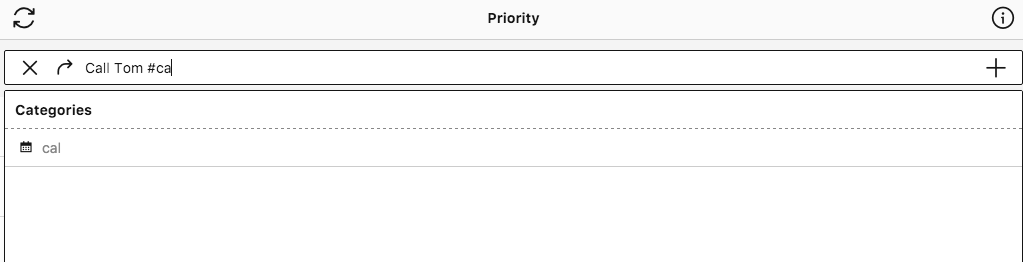
Please note this will only work for already existing categories and once you save the task, it will bear given category.
The second way to add a category is by choosing one from the details (2) of a task (1).
This will require you to pick one or more categories and confirm (3). At that point, all selected categories will be added to your task.
If you wish to remove a category from the task, just go again to the details of the task, click on the button now stating given category name, unmark it in the list and confirm.
Infobar of a Category
When you choose a category from your categories list, you can see all of the tasks across all the projects with this category.
You can also edit the category information and access additional options of this view by accessing the “info bar”:
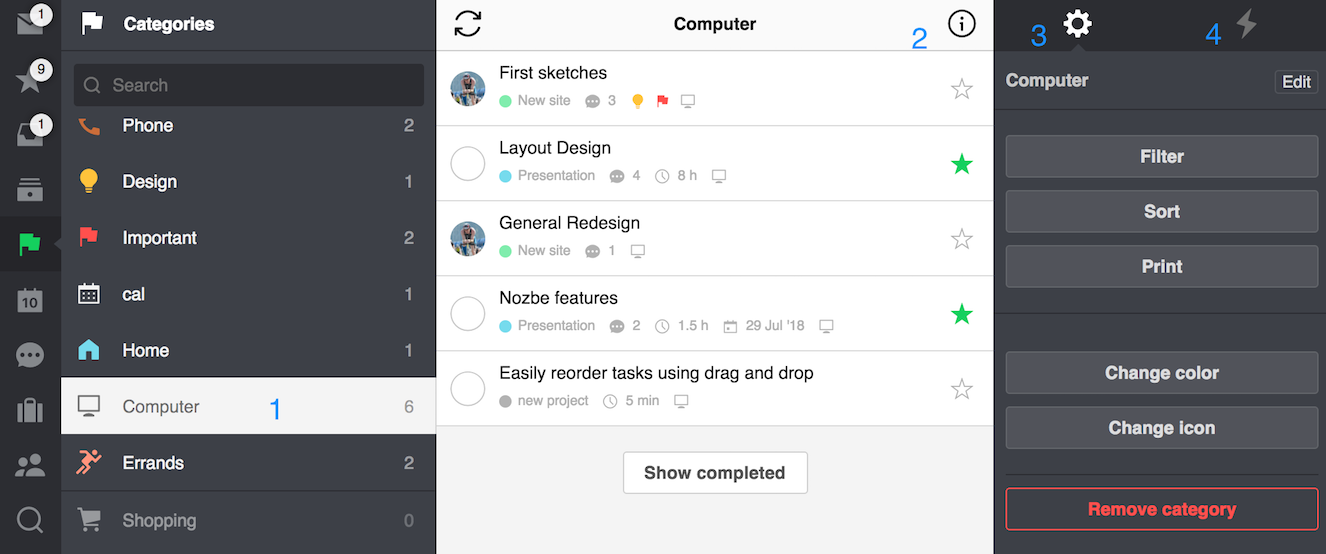
- Choose a category you wish to work on
- Click/tap the “i” icon
- Access the options available for selected category
- View all of the activities under this category
Managing Categories (edit mode)
You can manage multiple categories at once in the “Edit” mode:
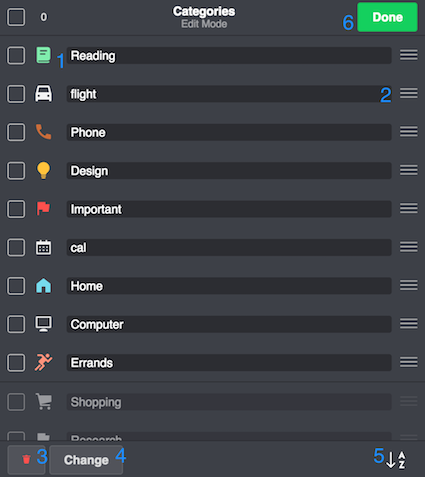
- Square icon near the name of the category allows you to select more than one category for editing; if you check the square at the top near no.1 you will choose all
- Triple line, grab a category by it to drag and drop it
- Delete selected categories
- Change/edit your category’s icon or color
- Allows you to sort categories alphabetically, once it is on/active the icon becomes highlighted
- “Done” button used to save all changes
Note: In the “Edit” mode you can also edit each category name in-line. Just click or tap on the name of the category and change its name.
Changing icons or colors of categories
Here’s how to change multiple categories' parameters:
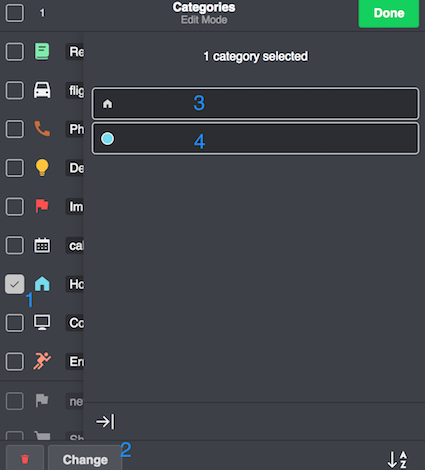
- Choose a category
- Click/tap “Change”
- Allows you to choose an icon
- Lets you choose a color
Note: By default, all categories are given no color and the 1st icon from the menu (“meeting”).
Sharing Categories
If you add a category to a task in a shared project it will automatically become shared with project members. They will also see the category icon that you selected but no color. Color of a category is individual, and each project member can set his color for each category.
More About Categories
Do you know how to use categories effectively? Are you aware that you can prioritize your priority list by using categories? Or maybe you want to know more about sharing categories? You can find the answers to all these questions on our blog.


